
How to Live Stream an Event: A Step-by-Step Guide [2022 Update]
13 Min Read


Emily Krings
Emily is a strategic content writer and story teller. She specializes in helping businesses create blog content that connects with their audience.
Live-streaming events are a fantastic way of connecting with your audience worldwide. Everyone from influencers to startups to government organizations to business corporations is jumping on the trend to reap its numerous benefits.
The live-streaming industry bloomed in 2019 and 2020, with about 57% of marketers leveraging it to build their brands. And with good reason. It connects you with a global audience in real time, increases brand awareness, promotes your business, and builds a dedicated following.
Recently, there’s been an increased demand for virtual access to live events. According to a 2021 survey, 16% of consumers in the UAE and 14% of European consumers showed interest in live shopping. It tells you about the impact of live-streaming events on the sales and marketing of a brand. Not only it helps you connect with the audience, but it also generates revenue for your business.
With such demand only increasing, it has become necessary for brands to learn how to live stream an event to position themselves in this ever-growing market.
Live streaming events aren’t just for organizations with big media budgets; it’s for everyone. From small businesses to startups, everyone can stream live events, such as:
- Concerts
- Sporting events
- Graduations
- Conferences
- Webinars
- Meetings
- Ceremonies
If there’s a live event happening, there’s potential to stream it and strengthen your connection with your audience.
If you’re new to live streaming, you might be overwhelmed with all the techy stuff. But with some learning, you can be a pro at streaming live events. Today, we’ll walk you through the basics of how to live stream an event, so your business can get in on this trend. We’ll cover everything from choosing the right platform to setting up your broadcast.
We’ll go over some of the benefits of live streaming an event and then provide you with an in-depth tutorial on the best way to live stream an event. We will wrap things up by discussing how to live stream an event with Zoom.
Table of Contents:
- Why Live Stream an Event?
- How to Live Stream an Event – A Step by Step Guide
- Identify Goals & Intentions
- Plan Your Live Stream
- Choose an Online Video Platform
- Set Up Equipment
- Configure Your Encoder
- Input Your Sources
- Create a Live Channel
- Embed Your Stream
- Do a Test Run
- Prepare Your Audience
- Start Streaming
- Add a CTA
- Replay your Live Stream
- How to Live Stream an Event with Zoom
- Bonus: How to Live Stream a Virtual Holiday Event
- Conclusion
Why Live Stream an Event?
Organizations can live stream events for numerous benefits. You can live stream an event to increase brand awareness, create a sense of community, or provide a paid experience for an exclusive audience. Live streaming provides your organization with another means of generating revenue.
Live streaming an event can help you continue to connect with your audience even when they can’t be there in person. Lockdowns related to COVID-19 proved the value of live streaming technology, with about 41% of artists going live more than once a month as of March 2021.
Since it offers the option of enjoying events from within the comfort of the home, the demand for live event streaming doesn’t appear to be going down.
Live-streaming events can strengthen your connection with your audience, whether you’re a business, an influencer, a gamer, or a content creator. It offers a great way to take your brand to the next level.
- Expand your reach: Connect with audience members interested in your event but can’t attend it live. You have the potential to connect with way more people virtually than could ever attend your event in person. The live streaming of events is a great way to expand your reach to the masses.
- Increase participation: Not everyone who wants to attend your event in person will be able to due to health reasons, time constraints, and financial concerns. With a live stream, many of those barriers disappear, allowing you to increase participation in your events. The connectivity enhances even more if you place a Q&A or interactive session within your stream.
- Learn about your audience: When you live stream your event with a professional video hosting service that provides analytics, you can learn about your audience’s location and how they engage with your content in real time. That can allow you to create more customized events in the future with live event streaming analytics.
- Motivate your in-person audience: If you have ever seen the crowd camera at a sports event, you know how people love to be on camera. When you live stream your event, you give your in-person audience a chance to be on camera. Use your live stream to get more in-person audience engagement.
- Include your virtual audience: Create engagement with your virtual audience. Ask them to tweet or respond to questions during the event to create more engagement.
- Share the moment: Event live streaming is a great way to share special moments with viewers worldwide. Don’t limit who can attend a graduation ceremony, product launch, or other events by keeping them in-person only; make all special moments virtually accessible.
Live streaming allows you to expand your reach, increase participation in your event both in-person and online, learn about your audience, and share special moments with a bigger audience.
How to Live Stream an Event – A Step by Step Guide

Live streaming an event may appear tricky if you’re new to the field. However, it’s pretty straightforward once you get the hang of it. The main thing is to invest in the right gear and create a solid plan; the rest comes easily.
Wondering about the best way to live stream an event? We got you covered! Let’s take a look at the main steps you can follow to stream events live like a pro.
1. Identify Goals & Intentions
Since live streaming requires several moving parts, it’s a good idea to identify your goals and intentions from the start.
Answer the following questions:
- What sort of event will you live stream?
- What is the purpose of live streaming that event?
- What do you hope to achieve?
- What is your intended return on investment?
- Will you monetize the event?
- What’s your budget?
You need to know what you are live streaming, who you’re streaming it to, and your overall goal for the event. That’ll help you move on to the next step, creating a plan for your event.
2. Plan Your Live Stream
Now that you know what event you will be streaming, its purpose, intended audience, budget, and desired outcomes, you can create a detailed plan for the event itself.
- Where will it be held?
- What is the agenda for the event?
- Who will be speaking? What is the form of entertainment?
- What type of sound system will you use?
- Who will you invite to the in-person event?
- How will you communicate and share the event with your virtual audience?
Planning lays out how your entire live event will go. So, devise a foolproof plan aligned with your goals and resources.
3. Choose an Online Video Platform
A streaming solution is a platform that hosts your live stream. When considering how to live stream an event, you’ll need to choose a streaming solution capable of bringing your vision to life.
Many professional-grade live streaming platforms are equipped with HTML5 video players that are white-labeled and can easily be embedded on your website, app, and social platforms.
When using one of the professional video streaming platforms, you and your viewers have access to specialized servers and sufficient bandwidth, among many other features, to ensure successful broadcasts. A professional broadcasting platform can typically handle large volumes of viewers, thereby allowing you to live-stream events remotely to reach a larger audience.
Choose a streaming solution that uses a global content delivery network with incredible streaming quality. That way, your virtual streaming event can accommodate large volumes of viewers in remote locations.
In short, the better the service you select–in terms of features, support, and cost–the better the broadcasting experience for you and the better the viewing experience will be for your audience.
We recommend comparing several streaming solutions and taking advantage of free trials before deciding on the right plan. Dacast, for example, offers a feature-rich free trial to give you a chance to test out our service for yourself when comparing it against broadcasting alternatives.
There are a few main features to consider when comparing live streaming services.
- Monetization opportunities: If you plan to generate revenue from your streams, you’ll want to ensure your streaming video platform offers monetization opportunities. Professional platforms (including Dacast, IBM Cloud Video, and Livestream) offer video monetization features such as pay-per-view, subscriptions, and advertisements. Dacast’s secure video paywall, for example, is integrated into the live-streaming platform.
- Ad-free streaming experience: Another benefit of professional streaming platforms is the absence of unapproved ads. With free broadcasting services like YouTube, your viewers experience a constant stream of unwanted and untimely advertisements.
- Addition of watermark: With a white-label video player, you can create and embed your watermark or logo onto your original content.
A professional online video platform will provide you with the live online event broadcasting environment you need for a professional setup and experience.
4. Set Up Broadcasting Equipment
Once you’ve chosen the live-streaming solution that meets your needs, it’s time to consider what recording equipment to invest in.
That’s a crucial component for streaming video, and it can be overwhelming to weigh all the options. We recommend taking the time to research a few different options before making a decision. That way, you can be sure the equipment you invest in is truly the best fit for your streaming goals.
Recording Camera
If it’s within your budget, we strongly recommend investing in a fully-featured live-streaming camera to ensure a professional-grade streaming experience. A super high-quality camera will do wonders for your broadcast. Moreover, it’ll improve the quality of both the audio and visual aspects, which will help to attract and retain new viewers.
We recommend three streaming cameras based on Engadget reviews:
- Canon Vixia HF R300 ($350)
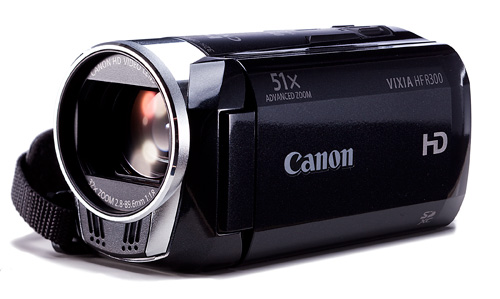
- Sony HVR-NX5U ($3,999)
- Canon Vixia HF G30 ($1,349)

Engadget features regular reviews of new technology, including cameras, so we recommend heading over there to compare your options. B&H Photo Video is another helpful site for technology comparisons and purchases.
We want to point out that smaller-scale streams may be able to make do with lower-cost webcams and capture devices. Live streaming a lecture or small conference-style event may not require a hefty investment in professional equipment. It’s up to you to determine what streaming quality you need to best suit your audience and deliver your message.
Capture Card
When live streaming with a camera, you often need a capture card to convert the video into streamable content. You can purchase a capture card and install it on your computer. Once installed, you can plug the camera into the capture card to get ready to stream.
For those who are recording live events through your laptop’s webcam and not using a camera, you will most likely not need to purchase a capture card. That’s true for most “webcam” methods, as they’re already stream-friendly.
Not sure if your webcam is compatible? Open Skype on the computer with which you plan to stream. If the video feature shows up, your computer/webcam does not require a capture card.
Microphone
It is also a good idea to invest in an external microphone to improve the stream’s audio quality. As for microphones, there are a few different ways you can go. We recommend checking out the list of best professional microphones by The Techlounge.
Also, get a microphone arm that supports your audio source. If you’re using a collar mic or a clip-on mic, there would be no need for a microphone arm.
Lighting Setup
Now that your technical gear is sorted, it’s time for another critical aspect: lighting. Well-lit surroundings can enhance your streaming quality and attract more viewers. People quickly lose interest in a video where they can’t see the subject clearly; hence, perfecting your lighting is critical for retaining viewers.
Fortunately, there are many ways you can do that. For beginners, we suggest using sunlight or a ring light. You can’t get a lighting source better than sunlight, and that too for free. Experiment with different angles, the direction of the light source, the right time, and the placement of shadows to get that perfect lighting setup.
Ring light offers an excellent, budget-friendly way to perk up the lighting for your streaming events. The circular shape helps remove the shadow from your face. Another piece of lighting equipment is a three-point light kit. However, it’s expensive and better suited for a professional setup. If you’re a beginner-level streamer, you can cover all bases with sunlight or ring light.
5. Connect Your Encoder

Whether using an external camera or a webcam; you’ll need to use a video encoder to convert RAW video files to streamable digital video files. You can use either hardware or software encoder. There are several options available for either type.
If you’re new to live-streaming, we recommend OBS Studio. It is a free, open-source software encoder that is relatively easy to navigate. More advanced alternatives typically cost between $500 and $1000. Some hardware encoders range beyond $3000.
Choosing an encoder compatible with your chosen online video platform is essential so you don’t run into any issues when configuring your settings. If your online video platform uses RTMP ingest, pretty much any RTMP encoder will do the trick.
How you configure your encoder will affect the quality of your live stream. Please check out our encoder setup guide for more information on how to successfully connect and configure your encoder.
Required Encoder Setting Configurations
If you’re streaming on Dacast, you must use the following live encoder configurations if you want your stream to work properly.
| VIDEO CODEC | H.264 (x264 may work) |
| FRAME RATE | 25 or 30 |
| KEYFRAME INTERVAL | 2 secs (or 2x frame rate) |
| SCANNING | Progressive |
| RATE CONTROL | Constant (CBR) |
| AUDIO CODEC | AAC-LC |
| AUDIO BITRATE | 128 kbps |
| AUDIO CHANNELS | 2 (Stereo) |
| AUDIO SAMPLE RATE | 48 kHz (48,000 Hz) |
6. Input Your Sources
Once you’ve got your encoder setup, it’s time to input your source. Source inputs are different for every encoder and online video platform, but this is important for every stream.
At this stage, you must connect your camera, microphone, and other sources to your encoder or switcher to incorporate them into the stream.
Please check out our dedicated guide to multiple source input.
7. Create a Live Channel
Next, it’s time to create a live channel on your online video platform. Each platform’s process is a little different, but it’s easy on Dacast.
If you’re streaming with Dacast, you can use the following steps to create a live channel:
- Log into your Dacast dashboard.
- Click the purple “Add +” button on the menu on the left-hand side.
- Select “Live Stream.”
- Give your live stream a name, indicate the source region, and select the number of renditions you’d like to create.
- You’ll be directed to another page where you should fill out the fields as prompted.
- Save your changes.
It just takes six simple steps to learn how to stream a live event with Dacast.
8. Embed Your Stream

Fortunately, embedding video is quite simple when streaming via a professional service like Dacast. Simply copy the embed code on the live channel you created and paste the code into the code of your website. That’ll allow you to share your live event stream wherever you want.
Broadcasters can choose between two embed codes: JS and iframe. Both work for playback on your website or app via desktop and mobile devices as long as the content supports it.
The JS embed code is the default embed code for Dacast and supports most features. That includes being responsive if the elements are designed inside a different size and working with the referrer restriction feature.
The iframe embed code is the most universally compatible. The caveat is that some features do not work with it. This embed code is not responsive, which means it’s a fixed size. The full-screen feature is also sometimes removed. However, it usually happens only if you’re using iframes within iframes.
If you want full access for your audience while streaming your event, use a professional video hosting service that supports JS embed codes.
9. Do a Test Run
Once you have everything set up to live-stream an event, it’s time to conduct a test run. Test runs are crucial because once you’re live, you have an audience. So it is difficult to troubleshoot and fix mistakes quickly. The best way to learn how to live stream an event is to practice before the big day.
It is also a good idea to test your streaming setup so that you can identify any weak links. By doing so, you know where you need backup options on hand. With a live stream event, you want to have solid backup options in place.
It would be best if you run through your entire stream. Presenters can use this opportunity to practice their parts. This trial run should take place at the same time of the day you plan to broadcast your streaming event so that you have a good idea of what the lighting will be like.
We also recommend testing your internet speed to ensure it is sufficient. The upload speed should be about double what you need for your stream. A solid internet connection is vital for a successful live-streamed event.
10. Promote Your Event
Now that you have put all this work into planning and preparing for your live event; you need to make sure people show up! Prepare a plan to promote your event.
There are many ways you can promote your event.
- Utilize your email list: If your company has a developed email list, put it to use! Send out an invitation to your live event, upload teasers to generate more interest, and send out a reminder email before you go live!
- Add it to the newsletter: If you send a weekly or monthly newsletter, have a section where you promote and share information about upcoming live events.
- Share it on social media: Social media is one of the best ways to catch people’s attention in the moment. Announce your event on your social media platforms, share teaser clips about your event, and run a countdown to the event’s start. Draw people into your event from your social media accounts.
- Create an invite: Create a formal invite where people can RSVP to your event. Then, send out reminders to everyone who RSVPed to your event before going live.
- Make teasers: Create short video teasers or trailers for your event. People love visual content, and teasers are a great way to drum up interest in your event.
- Send a press release: Hosting a massive event? Send a press release to the local paper and to industry websites and news outlets that could be interested in your event.
- Advertise: You can also run paid advertisements to increase interest in your event. Be sure to narrow down your target audience before running advertisements. That way, you can reach your target audience without wasting your resources.
You must invest in the promotion if you want people to show up to your live stream events. Use a countdown timer, so people can join the event before it goes live. A countdown timer generates interest and allows your audience to gather, so everyone is ready when the event goes live!
11. Start Streaming
It’s time to switch your live channel to “Online” and click “Start Streaming.” With that click, you are live. As you present, staying confident and having fun with the stream is important vital.
Encourage viewers to participate if you have a chat or Q&A plugin, to keep everybody engaged throughout the event. Having some interactive elements within your live stream can boost the watch time by 50-70%. Live stream events are more entertaining when your audience feels engaged in what is happening.
12. Add a CTA
The primary purpose of streaming events is to connect with the audience, increase brand recognition, and make them take action. Buying anything and becoming a customer, subscribing to your channel, following your social media, or signing up for your newsletter. Your live stream should end up with people inclined to take an action you want them to take.
In 2020 live streaming brought $6 Billion in sales in the 11.11 Global Shopping Festival. In 2022, Mitsubishi used Amazon live to reveal the new Mitsubishi Outlander. The event got double the targeted views, and their test drives were booked for an entire month. That shows how much impact live streaming events can have on your business.
Place a clear call-to-action that pushes viewers to take the desired action to achieve your intended goal.
13. Replay Your Live Stream
A great way to strengthen your relationship with your audience is to provide something to fall back on if they miss a live event. Many of your audience members can miss the live stream for various reasons. When they can watch a live video replay, it automatically makes them feel you care about your audience.
Moreover, you also can generate views even after the streaming has ended. Use a streaming platform to save and download your live video. You can share it across social media or publish it on your website.
How to Live Stream an Event with Zoom
Some events, like webinars, conferences, and private streams, call for participation from the audience. Peer-to-peer conferencing, which is the technical way to describe a video chat, is a valuable technology that allows viewers to participate in virtual live-streaming events.
Zoom is among the most popular peer-to-peer conferencing tools. But on its own, it’s not as capable as the advanced streaming professional online video platforms. However, some of these online video platforms, including Dacast, can be integrated with Zoom to give broadcasters access to the best of both tools.
Let’s run through the four steps for live streaming an event with the Zoom live streaming integration on Dacast.
Please note that this tutorial requires you to have a Zoom Pro, Business, Education, or Enterprise account to access the “Custom Live Streaming Service” Zoom feature.
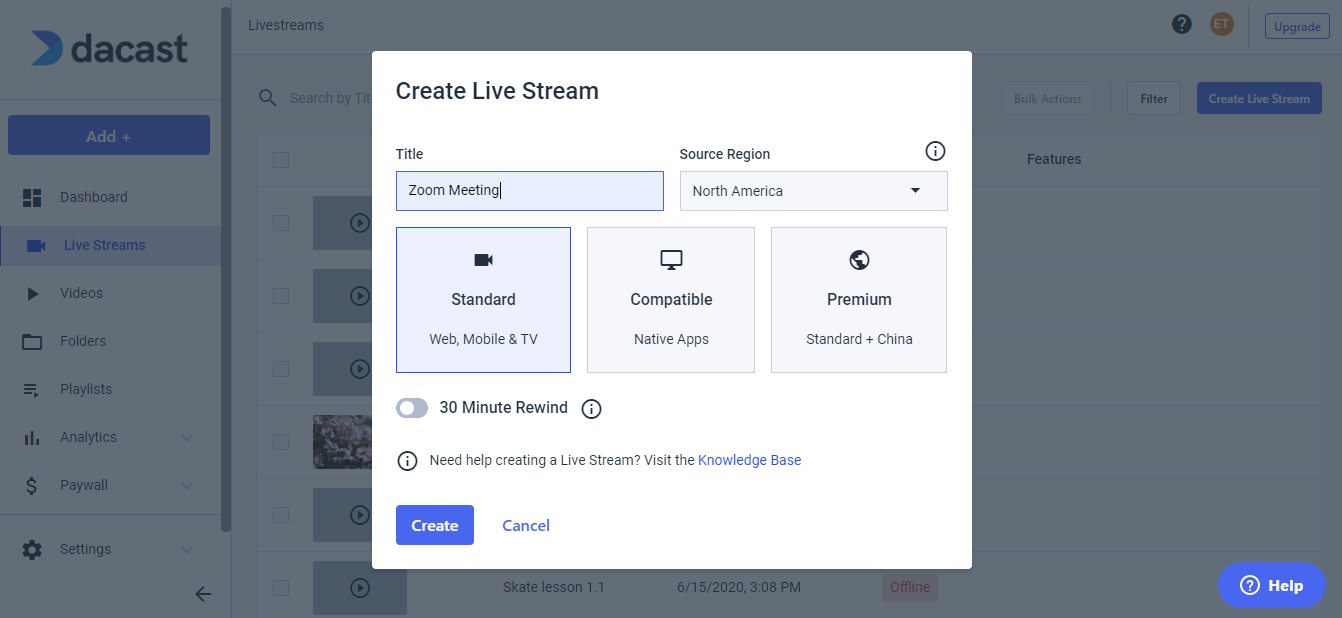
Step 1: Create Your Dacast Live Stream
Log in to your Dacast account, and go to the “Live Stream” section on the left-side vertical menu.
Click “Create Live Stream” on the right side of your screen. Enter a stream name, then select the type of stream. Click “Create”:
Your live stream should now appear in your live streams list. You can manage the stream by clicking the “Edit” icon on the right side.
Step 2: Enable “Live on Custom Live Streaming Service”
Log in to your Zoom account. On the vertical menu to the left, navigate to Admin. Click “Account Management” then “Account Settings.”
In the section “In Meeting (Advanced)” under the meeting tab, turn on the option “Allow Live Streaming Meetings,” and check the sub-option “Custom Live Streaming Service”:
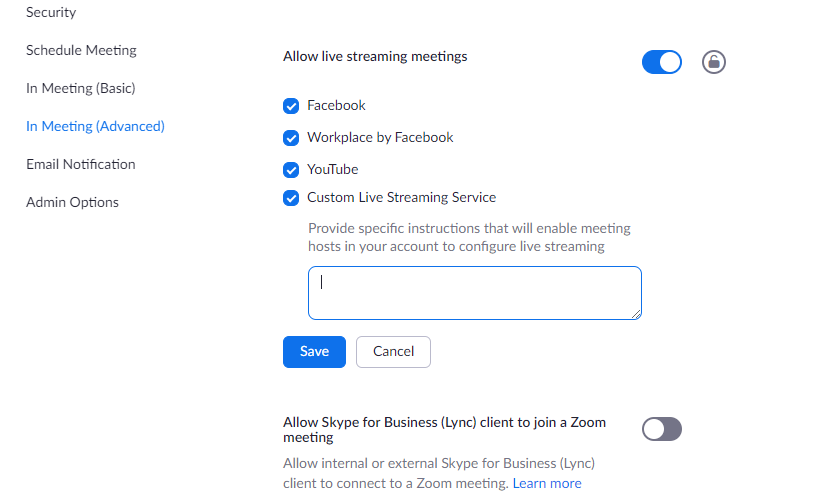
Update the instructions so that the meeting organizer can configure the required settings when scheduling the meeting. You can find these instructions in your Dacast account. Edit the live channel you want to use to stream the Zoom meeting.
Under the “General” tab, click “Encoder Setup,” and use the copy icon to copy and paste the required values into your Zoom account:
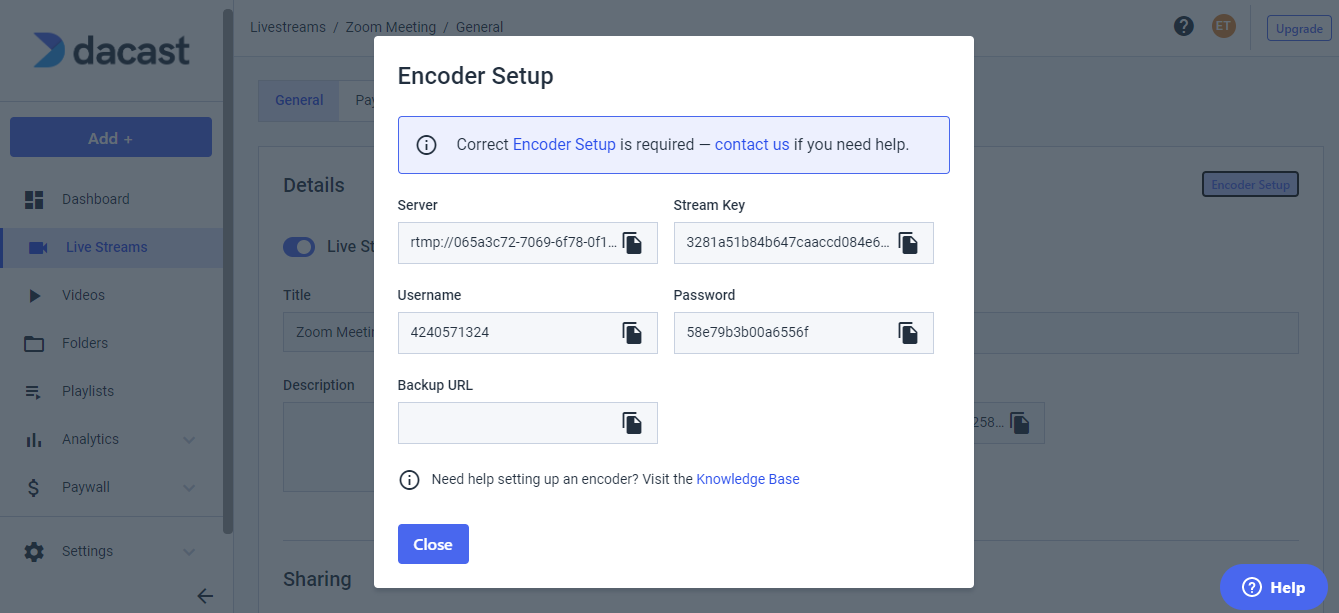 Make sure to use the following format:
| Stream URL: rtmp://{Username}:{Password}@{Server (without rtmp://)}
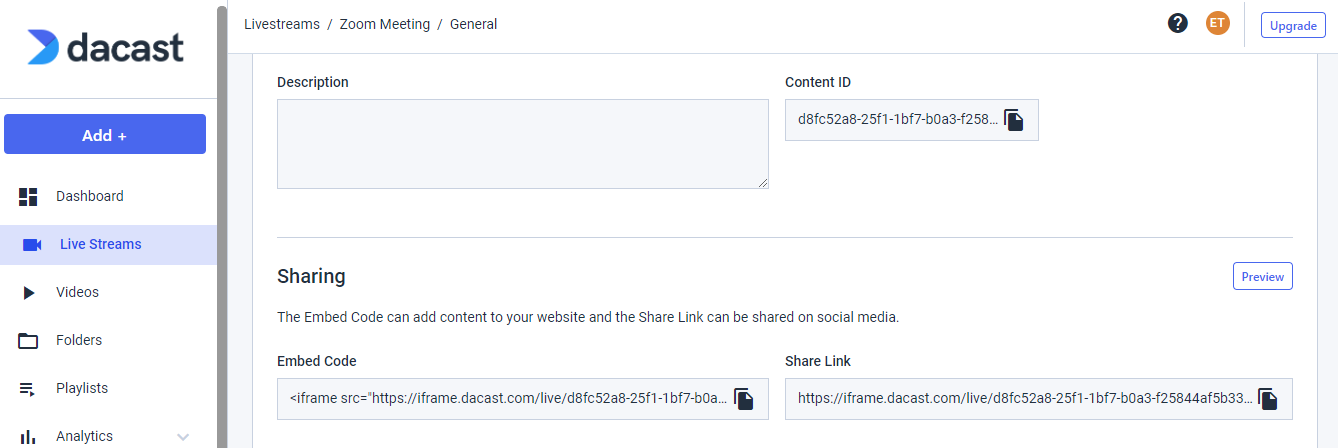
Stream key: {Stream Key} Live streaming page URL: you can use your website URL or the Share Link in the General tab of the live stream. |
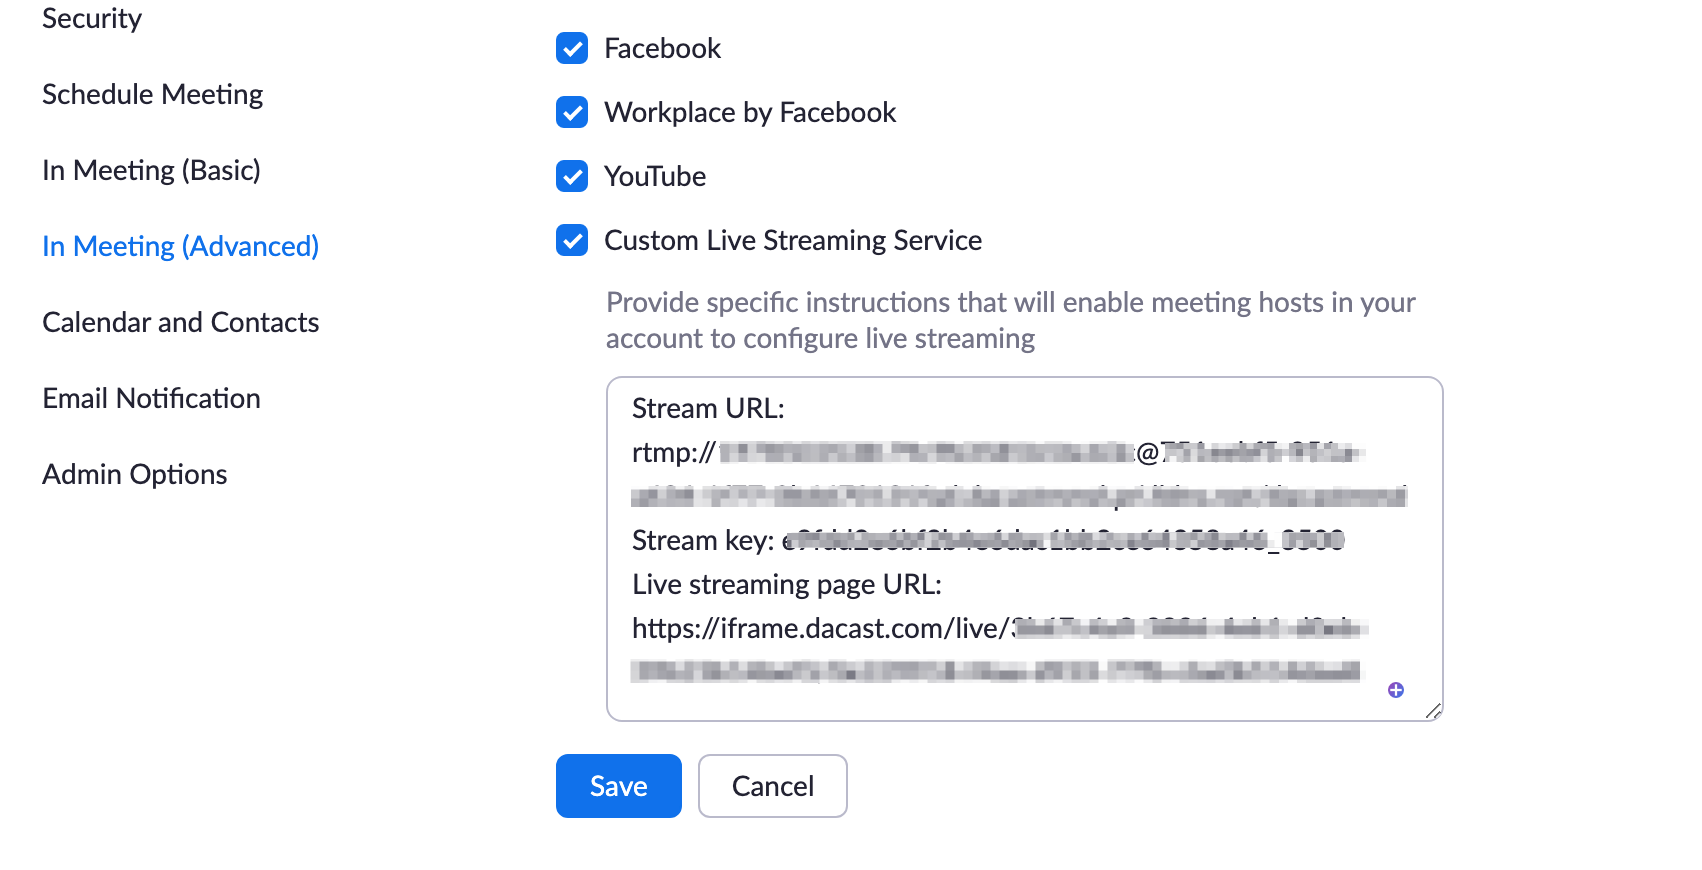
This is what it should look like:
Step 3: Set Up Your Zoom Custom Live Streaming Meeting
On your Zoom account, click “Meetings” then “Schedule a New Meeting.” Enter the required information, and click “Save” to display advanced options:
At the bottom of the page, click the “Live Streaming” tab. Then, click the “Configure Live Stream Settings” link:
Apply the information in the green box following the format we provided in Step 2:
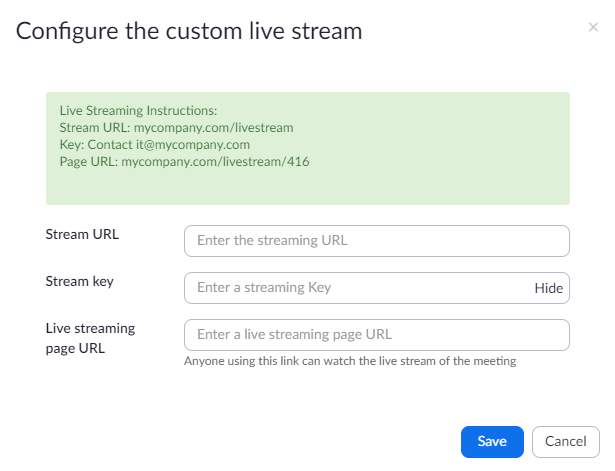
Click “Save” to save your live streaming settings. Now, the host will be able to live stream this meeting without having to add these settings after the beginning of the event.
Step 4: Start Streaming
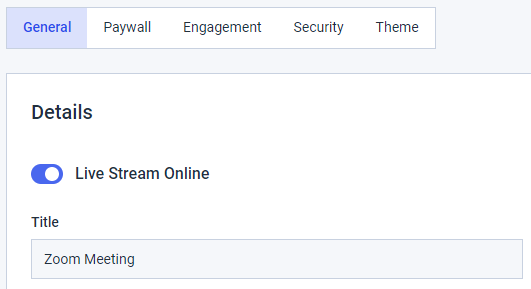
On your Dacast account, make sure that the live stream used for the meeting is set to “Online”:
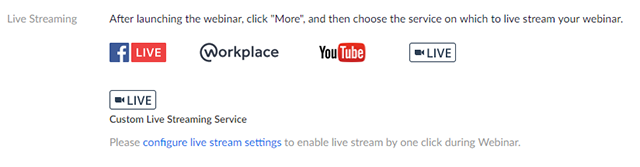
Open the Zoom application or web portal, and start your meeting. At the bottom of the Zoom window, click the “•••” icon and select “Live on Custom Live Streaming Service.”
If the Streaming URL, Streaming key, and Streaming page URL have not been entered at this point, Zoom will open a window where you can paste these values from the Encoder Setup section of your Dacast live stream.
Now that your Zoom meeting is ready, you’re ready to live stream it to your website via Dacast.
Bonus: How to Live Stream a Virtual Holiday Event
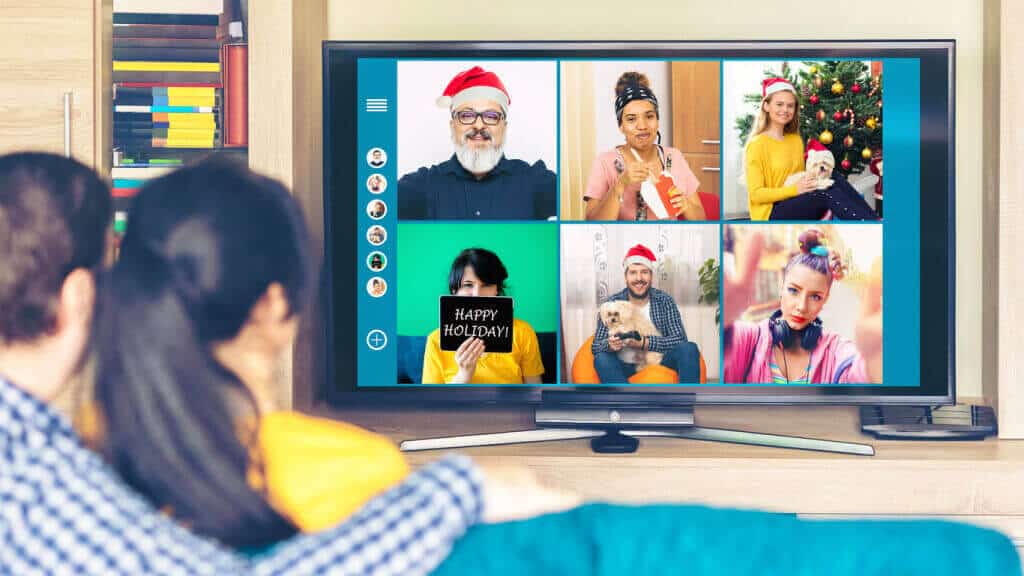
Holiday season is the best time to meet people and organize events with friends and family.
During this season, there’s also an increased demand for virtual events, as they help people get together during unpredictable winter weather and connect with friends and family in other places.
Organizations, from grade schools to churches to corporations, put on special events during the holiday season, such as:
- Christmas pageants
- Holiday concerts
- Holiday sing-alongs
- Religious ceremonies
- Holiday awards
- Holiday parties
More businesses and organizations are turning to live streaming, including more members of their community in these heart-warming events. Live streaming allows people who can’t travel or face other restrictions to participate in important holiday events.
Web conferencing holiday parties help friends and co-workers come together to celebrate. Light-up nights, New Year’s countdowns, Santa sightings, and other cheerful events can also easily be streamed.
Here’s a detailed tutorial on how to live stream a holiday event in 6 steps:
- Prepare Your Audience
- Set Up Equipment
- Choose an Online Video Platform
- Configure Your Encoder
- Create a Live Channel
- Start Streaming
For more information on hosting a virtual Christmas event, we recommend checking out our dedicated virtual holiday event streaming guide.
Conclusion
Professional hosting of live stream events has many benefits for businesses, especially when engaging a remote audience. Live streaming an event takes a bit of preparation and setup, but the process is very straightforward. And it reaps tons of benefits for your brand in terms of engagements and revenue.
Choosing the right online video platform plays a significant role in the success of your live-stream event. We suggest taking advantage of free trials to test different platforms and familiarize yourself with their features.
Not sure where to get started? Why not give the Dacast platform a try? Test out all our great features risk-free for 14 days to see how our platform can help you achieve your live streaming goals. No credit card is required.
You can also join our LinkedIn group for exclusive offers and regular tips on live streaming.
Emily Krings
Emily is a strategic content writer and story teller. She specializes in helping businesses create blog content that connects with their audience.
Read Next


How to Create Video-on-Demand Platforms that Help Your Business
Max Wilbert


How To Build a Live Streaming App on iOS and Android [2023 Update]
Max Wilbert


OTT Hosting and Video Delivery: 10 Best Solutions for 2023
Max Wilbert
Read Next
How to Create Video-on-Demand Platforms that Help Your Business
Max Wilbert
How To Build a Live Streaming App on iOS and Android [2023 Update]
Max Wilbert